2. JetPack Compose Preview
- Ranjith kumar
- Jul 30, 2021
- 2 min read
Updated: Sep 30, 2021
Introduction:
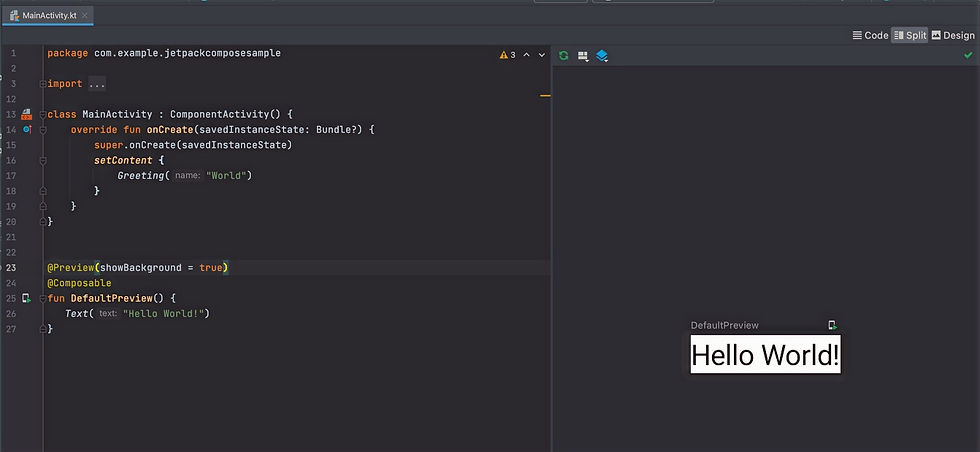
In Jetpack Compose we can see the preview of our code in Android studio. It allows us to see the output without running our app.
Click the split to see both code and preview.
How to add a preview?
You need to add @Preview() annotation before the composable function. After adding this annotation we are able to see the preview of our UI.
@Preview()
@Composable
fun DefaultPreview() {
   Text("Hello World!")
}
What is the customization available in @Preview?
When we analyze the @Preview class it has so many cool features. Click (command + click) the @Preview annotation you can see the following options:
annotation class Preview(
    val name: String = "",
    val group: String = "",
    @IntRange(from = 1) val apiLevel: Int = -1,
    // TODO(mount): Make this Dp when they are inline classes
    val widthDp: Int = -1,
    // TODO(mount): Make this Dp when they are inline classes
    val heightDp: Int = -1,
    val locale: String = "",
    @FloatRange(from = 0.01) val fontScale: Float = 1f,
    val showSystemUi: Boolean = false,
    val showBackground: Boolean = false,
    val backgroundColor: Long = 0,
    @UiMode val uiMode: Int = 0,
    @Device val device: String = Devices.DEFAULT
)
How to customize?
There are two ways you can customize the preview.
Set the customization by manually typing.
Using preview editing tool.
Steps for enable Preview editing tool
Preview editing tool not available by default. If you want to enable do the following steps
Click Android studio from top menu
Goto Settings (mac users click -> Preferences)
Click Experimental
Enable the last checkbox -> Enable @Preview picker
Finally click Apply and OK

After enable this we can able to see the settings icon in @Preview.
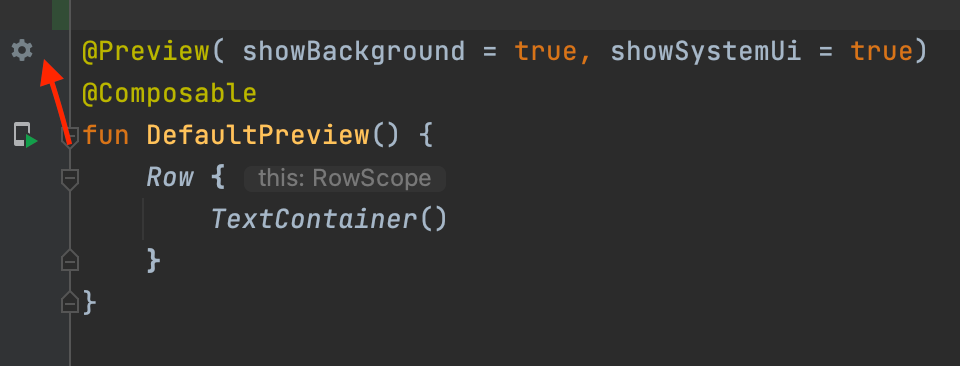
When you click this settings icon you can customize the Preview effortlessly.
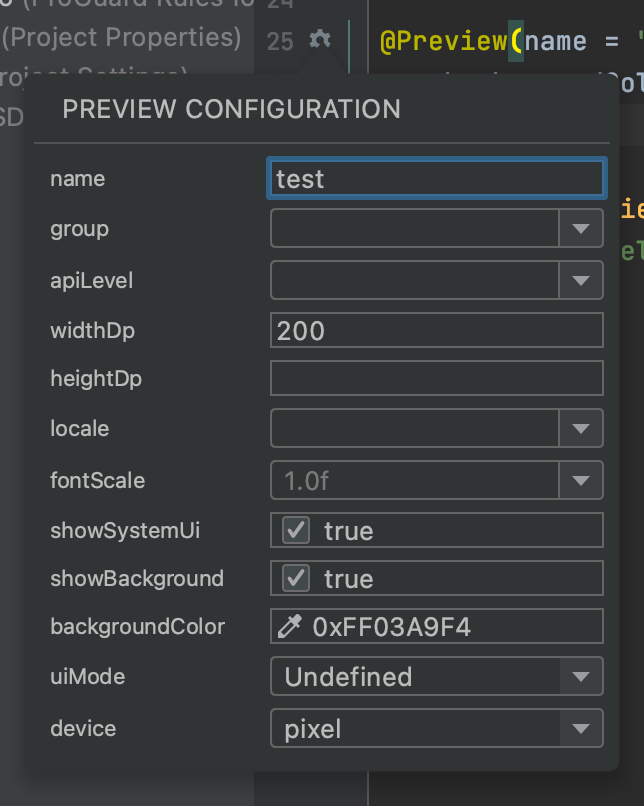
1. Name
@Preview(name = "Preview1")if you give the name argument it will show the given name ("Preview1") in your preview area. We can add multiple previews in same class, so if you give the name you can identify easily.
2. Background
The composable function doesn’t define any background on its own, but you can add one to the preview by setting showBackground = true in the Preview annotation. There’s also backgroundColor argument to change the color.
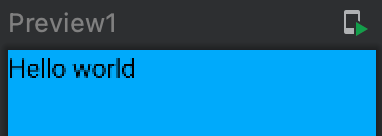
@Preview(name = "Preview1", showBackground = true, backgroundColor = 0xFF03A9F4)3. Height and Width
Composable function set it's width and height by default in a wrap_content. If you want to change pass the desired widthDp and heightDp values.
@Preview(name = "Preview1",  showBackground = true, widthDp = 200, backgroundColor = 0xFF03A9F4, heightDp = 50)
@Composable
fun DefaultPreview() {
 Text(text = "Hello world")
}
Preview
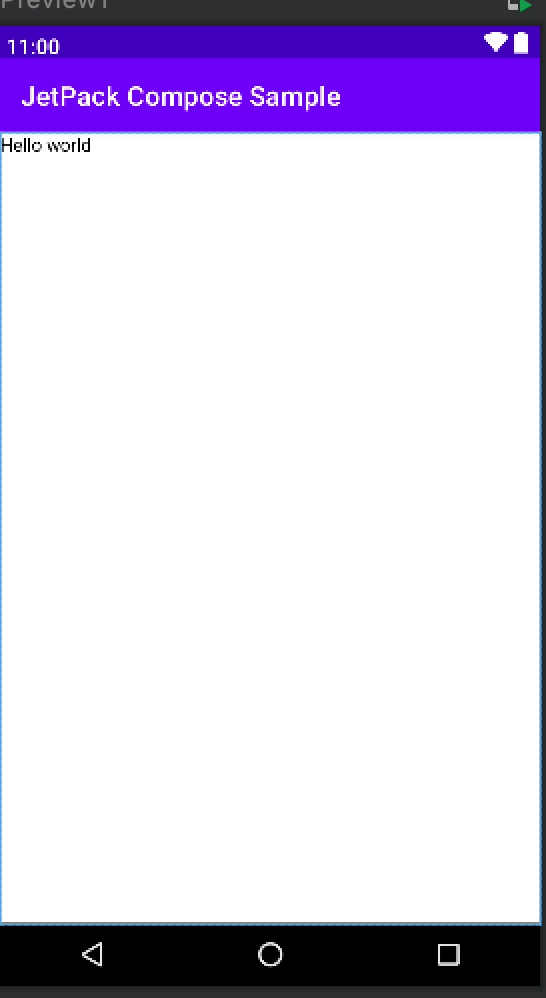
4. SystemUI and Device
You can preview a composable function in a dummy screen (with a status bar, Toolbar and navigation menu). Just set showSystemUi = true and you are ready. You can also change the device frame used — e.g. device = Devices.PIXEL.
@Preview(name = "Preview1", device = Devices.PIXEL, showSystemUi = true)
@Composable
fun DefaultPreview() {
 Text(text = "Hello world")
}
Preview
5. Multiple Previews
You can add multiple previews. Just add @Preview annotation in your composable.
@Preview(name = "Preview1", showBackground = true, backgroundColor = 0xFF2196F3)
@Composable
fun Preview1() {
 Text(text = "Hello world 1")
}

@Preview(name = "Preview2", showBackground = true, backgroundColor = 0xFF2196F3)
@Composable
fun Preview2() {
    Text(text = "Hello world 2")
}
Conclusion:
I hope you get the basic idea about @Preview annotation. Please refer following tutorials for more details.
Official tutorial
Official youtube guide


Comments